Sale!
New
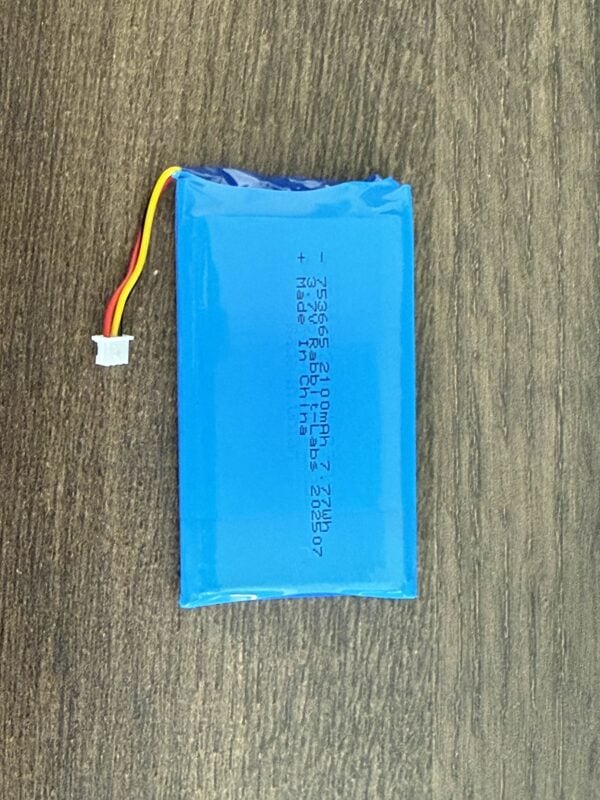
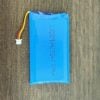
NEW – Rabbit-Labs Custom made Flipper Zero replacement battery.
$ 28.78
Is your Flipper Zero battery not lasting like it used to? Well you’re (FINALLY) in luck! We are now offering a NEW Custom Built Rabbit Labs battery for the Flipper Zero. Designed to work seamlessly with the flipper zero, this battery includes the proper protection circuit and thermistor to ensure safe charging and battery management. The batteries have been built to meet or exceed the specificiations of the original Flipper Zero’s battery. Unlike batteries you’ll find on AliExpress (which are not designed FOR the flipper, but are instead generic look-a-likes), these batteries were designed from the ground up to be a 100% perfect fit replacement including a precision-length connector cable to ensure easy installation. In order to be able to charge the battery to 100%, you will need to use the “Gauge Tool” which we have forked and can be downloaded on GitHub: https://github.com/tehrabbitt/flipperzero_gauge_tool Installation Steps to Follow: 1.) Carefully dismantle your flipper – Be careful not to break your iButton pins, and be careful not to tear any ribbon cables! 2.) Unplug the battery from the PCB and remove the black plastic battery holder from the rest of the flipper. Note how the power cable is routed THROUGH the small opening near the SD Card slot. 3.) CAREFULLY remove the existing battery. It is held on using TWO small strips of double-stick adhesive tape. it is crucial you avoid puncturing the battery, so do not use any sharp tools, or metal tools. Use a plastic spudger if you have one, or a guitar pick and CAREFULLY pry it apart from the plastic as to not crack the plastic either. (WE ARE NOT RESPONSIBLE FOR IMPROPER REMOVAL OF THE ORIGINAL BATTERY! YOU HAVE BEEN WARNED). Please take note which way the wire is run, and how it is currently is inserted, you will want to make sure that the wire side is tucked UNDER the little clips when re-inserting the replacement battery. 4.) Install the replacement battery and make sure it is pressed down flush, you’ll have to install it under the small plastic clips as to prevent them from pressing into the edge of the battery. Be very careful at this step! 5.) Phew, the hard part is done! go ahead and re-route your cable, and press it firmly back into your flipper’s main board. again the cable sits nicely right along that slit near the SD card slot. Make sure not to pinch the wires, and make sure the connector is being pressed into the connector the right direction! If you reverse polarity of the connector, irreversible damage to your flipper will occur! You need to use some force when inserting the new battery’s JST connector. the original connector was just press-fit, and did not “click” into place. the new battery’s connector actually “clicks” in but you do need to use more force than you would expect. once it clicks in, it stays in and does not fall back out. I suggest using a smooth surface alongside the top of the JST connector to firmly press the connector into place (Do not try using fingernails, it wont’ work). 6.) Carefully re-assemble your flipper. 7.) Install the GAUGE TOOL using the link above. you will need to compile it using FBT and place it on your flipper. We are working on making a .FAP file available for easier use (WORK IN PROGRESS) 8.) Open the GAUGE TOOL and select “UNSEAL” using the Left arrow. wait for it to unseal, and then go ahead and charge your flipper to 100%. 9.) Once the flipper hits 100%. Open the GAUGE TOOL and Select “RESET” (right arrow) and plug the flipper back in and allow it to charge back to 100%… (it will likely drop to 95% after reset) 10.) Once it hits 100%, make sure to re-open the GAUGE TOOL and select the center button “FULL”. this will mark the battery as “full” and record the state of charge so that it is now calibrated. You may need to try the above calibration steps (7 through 10) after a few charge cycles for best results. While all RL Batteries are UN38.8 Safety Tested they can only be shipped domestically within the United States without incurring a “Hazmat Handling Fee” from DHL / FedEx. **These batteries will only be offered (for now) domestically within the 48 contiguous United States ** REMINDER – REPLACING A LITHIUM BATTERY IS DANGEROUS AND SHOULD ONLY BE ATTEMPTED AT YOUR OWN RISK. WE ARE NOT RESPONSIBLE FOR ANY BODILY INJURY, PROPERTY DAMAGE/LOSS OR FIRES DUE TO IMPROPER INSTALLATION OR FAILURE TO ABIDE BY THE WARNINGS ON THIS PAGE. NEVER USE METAL TOOLS WHEN REMOVING THE EXISTING BATTERY AS YOU MAY PUNCTURE IT – RESULTING IN AN EXPLOSIVE RELEASE OF HOT TOXIC GASES, AND POTENTIALLY MOLTEN ELECTROLYTE WHICH CAN LEAD TO FIRES! YOU HAVE BEEN WARNED. WARNING: The user must have appropriate understanding of lithium ion batteries before purchase. Use caution when working with and using lithium ion batteries as they are very sensitive to charging characteristics and may explode, burn, or cause a fire if misused or mishandled. Always charge in or on a fire-proof surface. Never leave batteries charging unattended. Buyer is responsible for any damage or injury caused by misuse or mishandling lithium ion batteries and chargers. No express or implied guarantee of compatibility with any device can be made. Charge only with a smart charger designed for this specific type of lithium ion battery. Do not mix and match old and new, used and unused batteries. DO NOT USE WITH E-CIGARETTE, VAPORIZER, OR SIMILAR DEVICE KEEP OUT OF THE REACH OF CHILDREN! MISUSING OR MISHANDLING LITHIUM ION BATTERIES CAN POSE A SERIOUS RISK OF PERSONAL INJURY, PROPERTY DAMAGE, OR DEATH BATTERIES MAY EXPLODE, BURN, OR CAUSE A FIRE IF MISUSED OR MISHANDLED ONLY USE WITH PROPER CIRCUITRY IN A PROTECTED BATTERY PACK ONLY USE WITHIN MANUFACTURER LISTED SPECIFICATIONS DO NOT STORE LOOSE BATTERY IN A POCKET, PURSE ETC. – ALWAYS USE A PROTECTIVE CASE OR BOX KEEP AWAY from metal objects to prevent short circuiting DO NOT short circuit DO NOT use if wrapper or insulator is damaged or torn DO NOT use if damaged in any way DO NOT overcharge or over-discharge DO NOT modify, disassemble, puncture, cut, crush, or incinerate DO NOT expose to liquids or high temperatures DO NOT solder, spot weld only User must be familiar with handling lithium ion batteries before purchase Usage of batteries is AT YOUR OWN RISK ALWAYS charge in or on a fire-proof surface and never leave charging batteries unattended RESELLERS MUST FORWARD ALL WARNINGS TO ALL CUSTOMERS FOR THEIR REFERENCE AND SAFETY
This is a text for this product only. Add anything here
Related products
Sale!